Connect Claude
Connect the Claude app, Claude Code or Claude Desktop to your site with one connection link.
On this page
Claude connects to your site with a connection link: one address that already carries its own key. You create it in Uncoder, paste it into Claude once, and you are done. Signing in to your site instead of using a link is still possible.
| Method | Works in | What you do |
|---|---|---|
| Claude app | Claude on the web, the desktop app and mobile | Click Add to Claude, or paste the link as a custom connector. Your site must be public and use HTTPS. |
| Claude Code | The Claude Code terminal app | Run one command with the link. Works with a site on your own computer too. |
| Claude Desktop | Claude Desktop, for a site on your own computer | Add the link to the config file. |
| Sign in instead | The Claude app and Claude Code | Paste the plain Server URL and approve Claude on your site. No key in the address. |
To see the steps for your site, go to Uncoder → AI & MCP → Connect a client and click Claude. The methods are the tabs at the top of the panel. You create the link once and it is filled into every Claude tab. It is listed as "Claude link" under API keys, where you can revoke it.
Claude app
This is the easiest way. Once added, the connector is available in Claude on every device, including Claude Desktop.
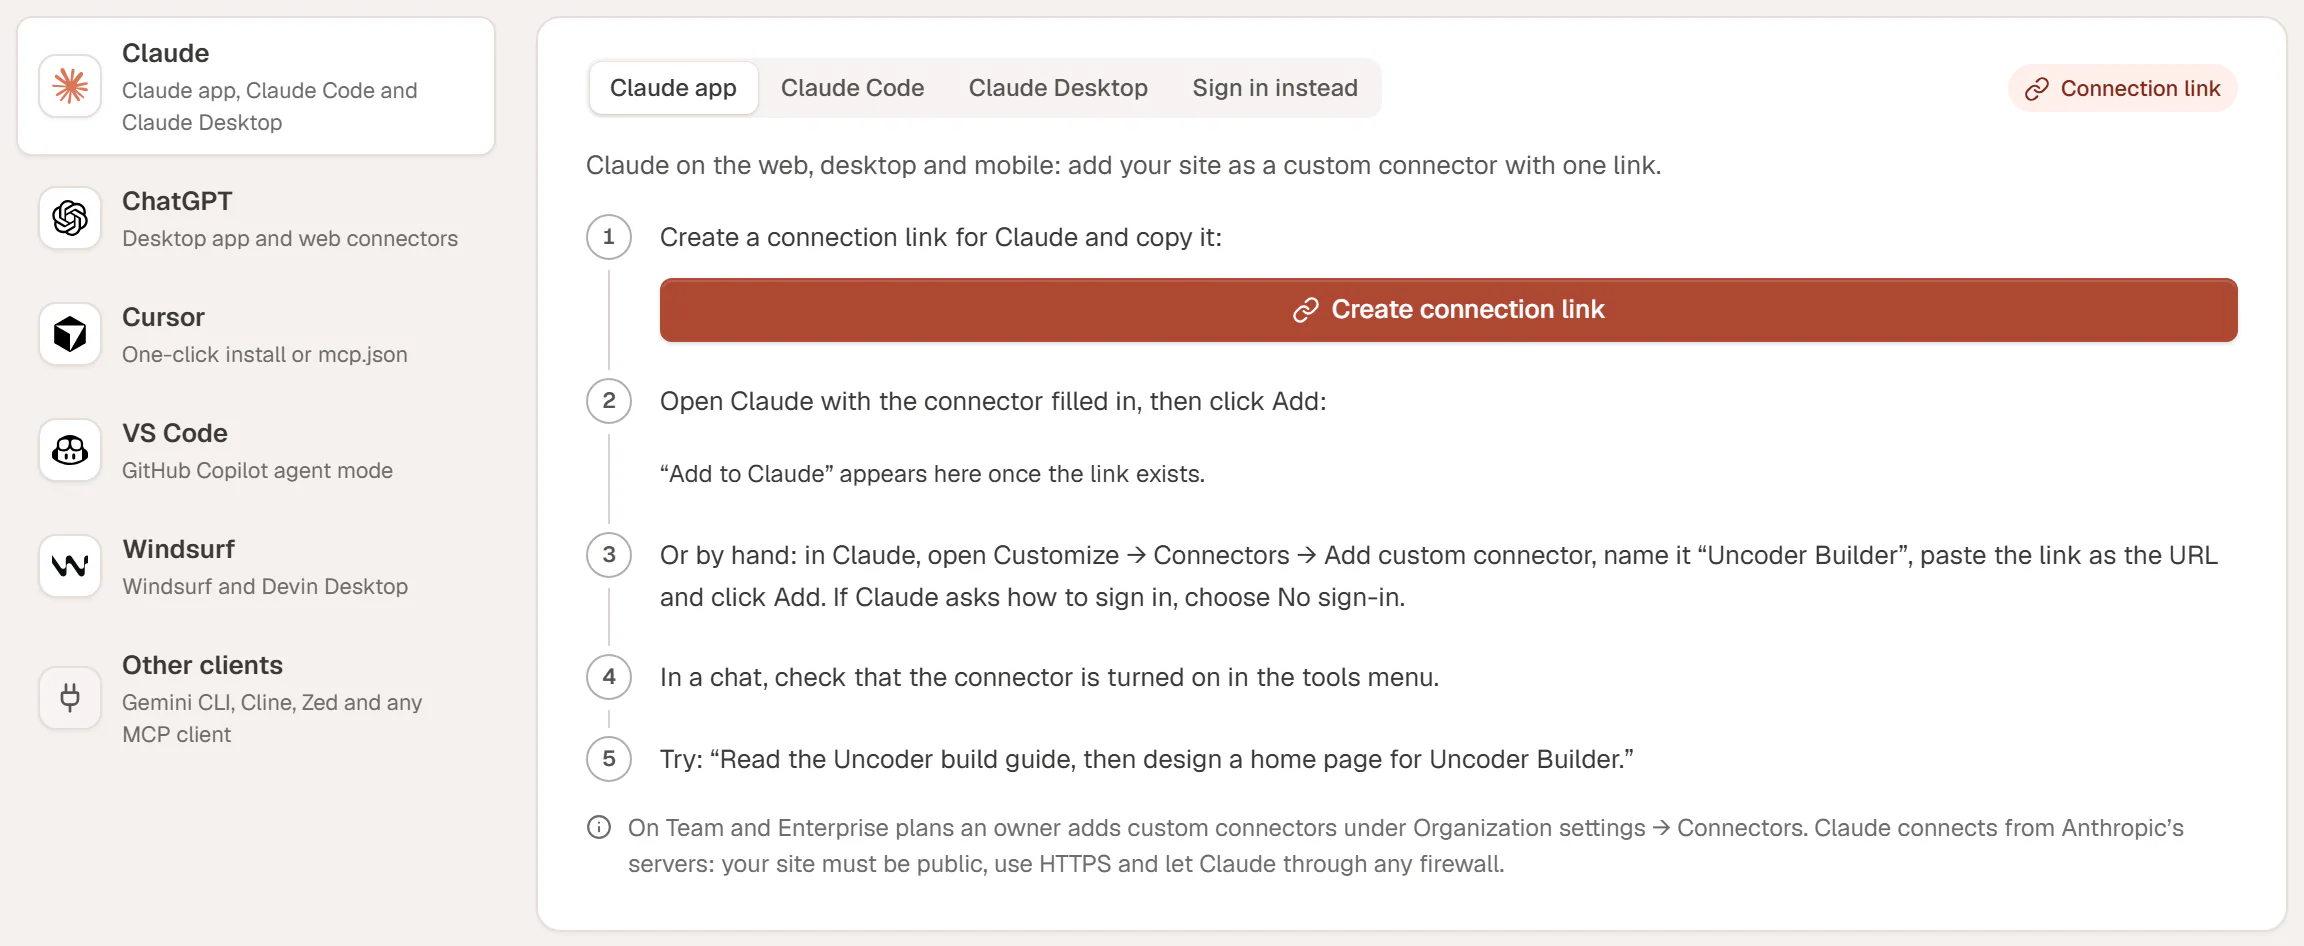
Before you start: your site must be public and use HTTPS. Claude connects from Anthropic's servers, so it cannot reach a site that only runs on your computer, and a firewall or security plugin must let it through. For a local site, use Claude Code or Claude Desktop instead.
Create a connection link
On the Claude app tab, click Create connection link. The link appears with a Copy button. It is shown only once.
Add it to Claude
Click Add to Claude. Claude opens with the connector already filled in: your site's name and the link. Click Add.
Or add it by hand
In Claude, open Customize → Connectors and click Add custom connector. Name it after your site, paste the link as the URL and click Add. If Claude asks how to sign in, choose No sign-in.
Turn the connector on in a chat
In a chat, open the tools menu and make sure your site's connector is turned on.
Try it
Ask something like: "Read the Uncoder build guide, then design a home page for my site."
On Claude Team and Enterprise plans, an owner adds custom connectors in Organization settings → Connectors. Members then turn the connector on for themselves.
A connection link gets the Read, Content and Design permissions: Claude can read, create and edit pages, posts, media and the design, but not change site settings. Keep the link private, like a password. See Connection links.
Claude Code
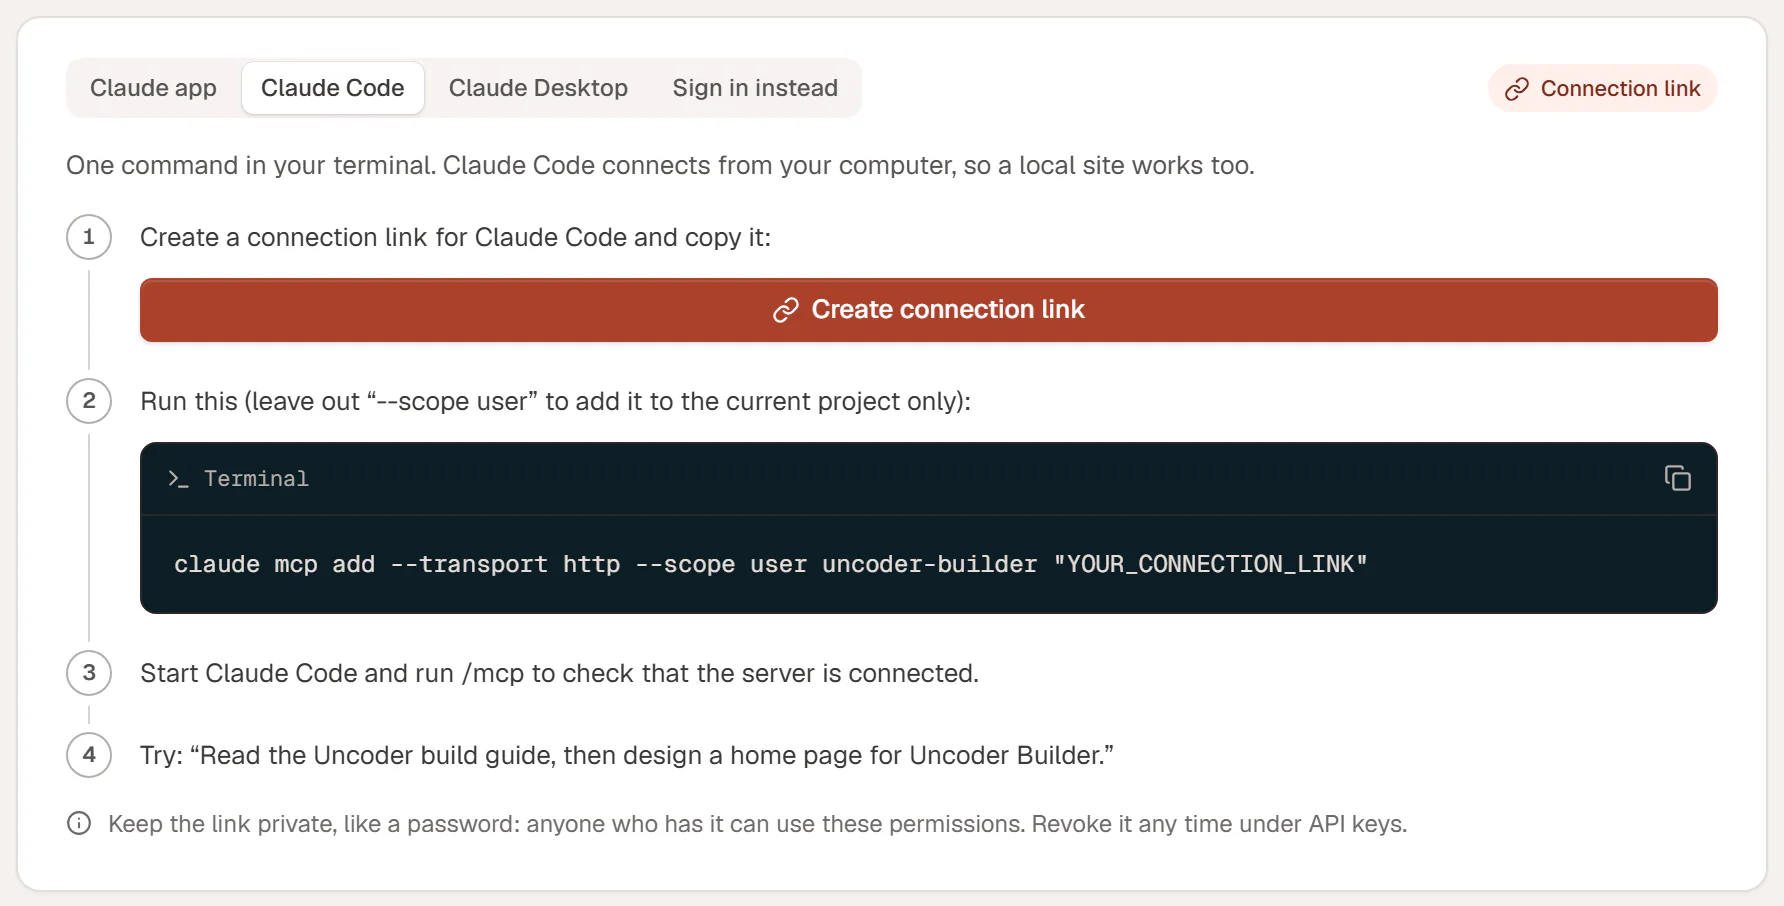
Claude Code connects from your computer, so a site on your own machine works too. You add the server once from your terminal.
Create a connection link
On the Claude Code tab, click Create connection link. The link is filled into the command on the page.
Add the server
Copy the command and run it in your terminal:
Terminalclaude mcp add --transport http --scope user uncoder-my-site "https://example.com/wp-json/uncoder/v1/mcp?token=uncoder_link_…"--scope usermakes your site available in every project. Leave it out to add it to the current project only. Keep the quotes around the link.Check the connection
Start Claude Code and run
/mcp. Your site's server should show as connected.
Claude Desktop
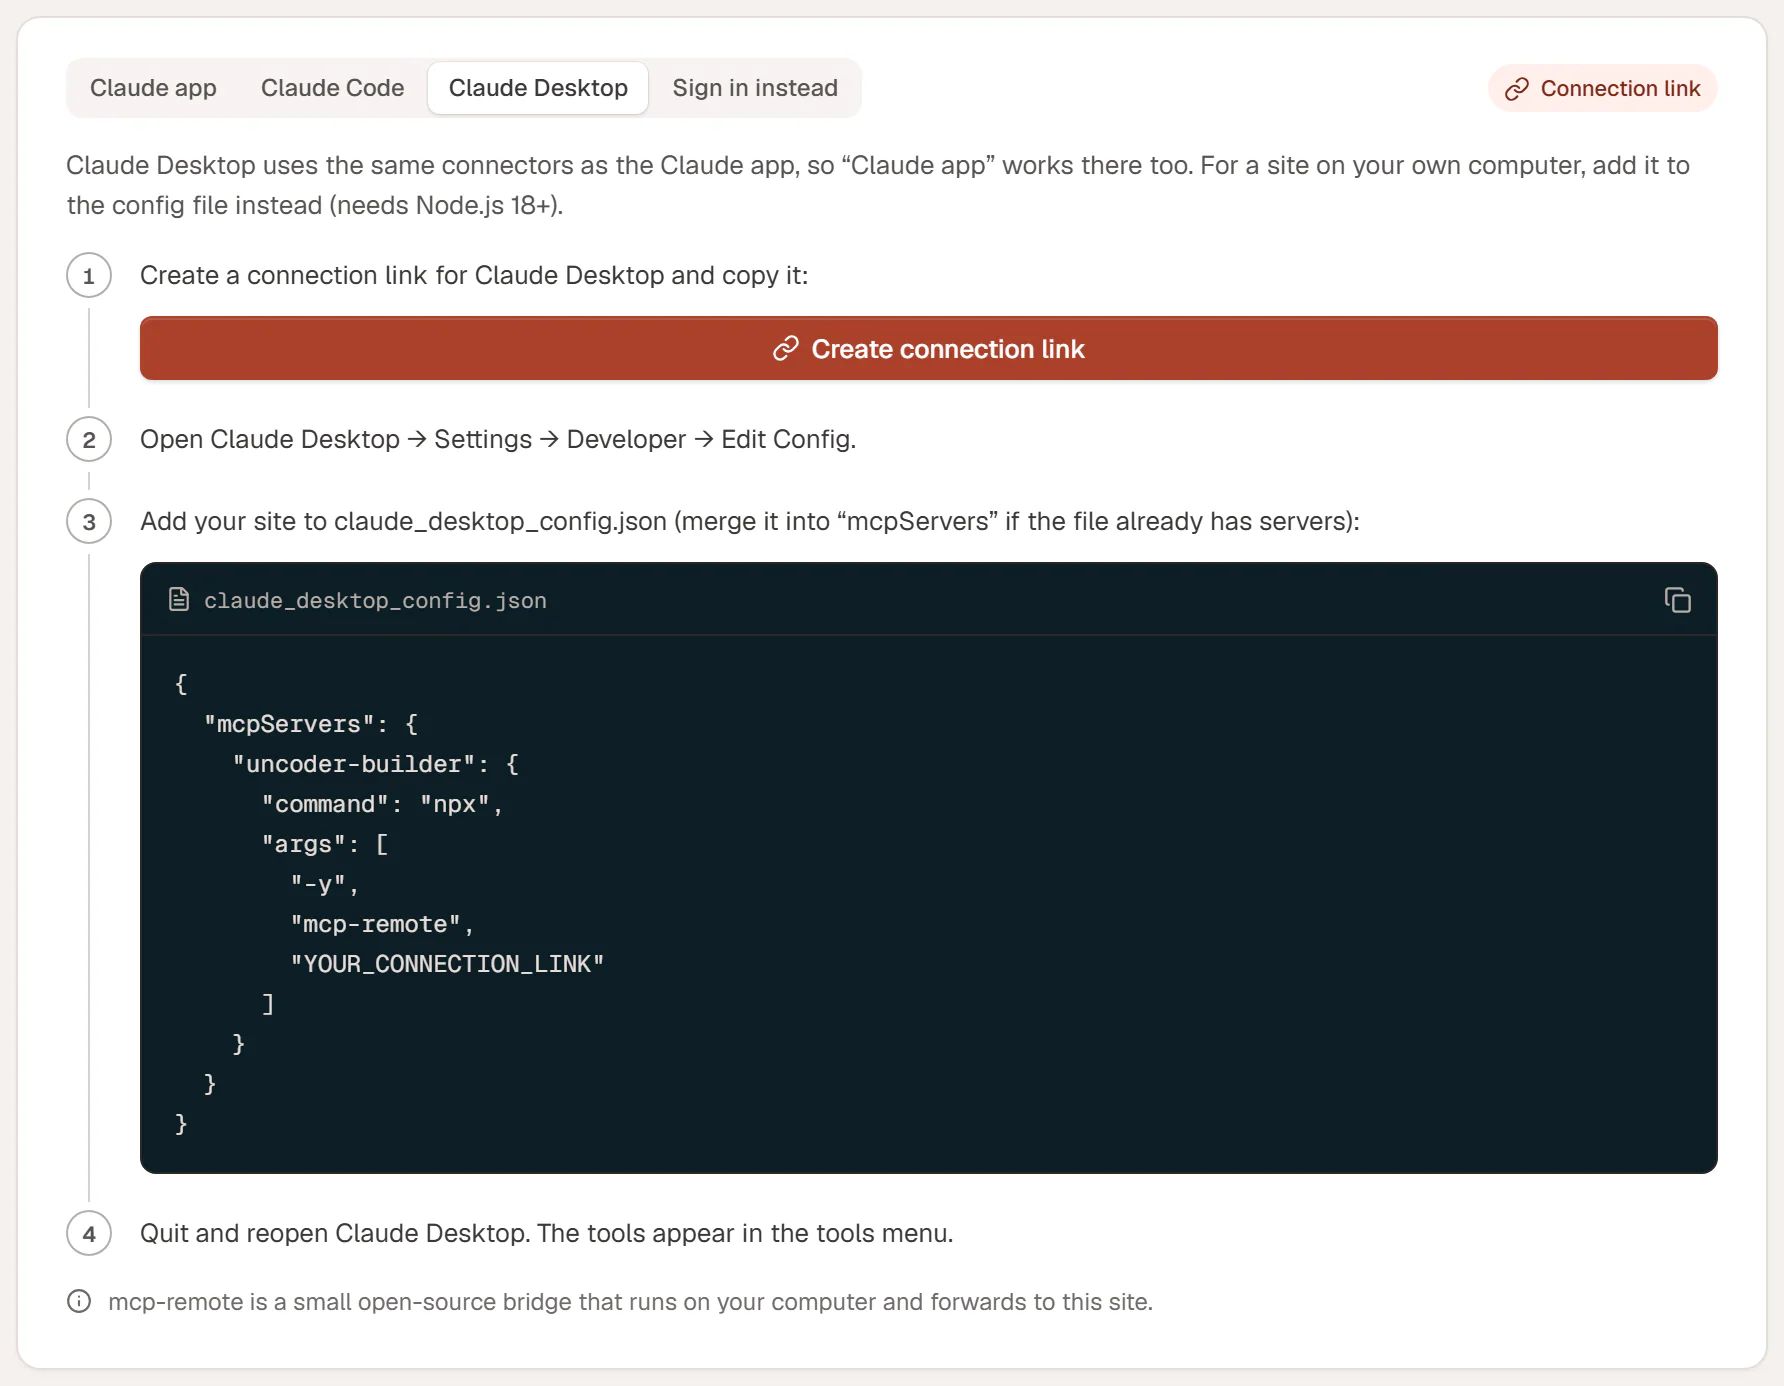
Claude Desktop uses the same connectors as the Claude app, so for a public site the Claude app method is all you need. For a site on your own computer, add it to Claude Desktop's config file instead. Claude Desktop then starts mcp-remote, a small open-source bridge that runs on your computer and forwards requests to your site. The bridge needs Node.js (opens in a new tab) 18 or newer.
Create a connection link
On the Claude Desktop tab, click Create connection link. The link is filled into the snippet on the page.
Open the config file
In Claude Desktop, open Settings → Developer → Edit Config. This opens
claude_desktop_config.json.Add your site
Paste the snippet from Uncoder. If the file already has servers, add the new entry inside the existing
"mcpServers"block.JSONclaude_desktop_config.json{ "mcpServers": { "uncoder-my-site": { "command": "npx", "args": ["-y", "mcp-remote", "http://my-site.test/wp-json/uncoder/v1/mcp?token=uncoder_link_…", "--allow-http"] } } }mcp-remoteuses plainhttponly forlocalhostunless you add--allow-http. Uncoder adds it to the snippet when your site needs it.Restart Claude Desktop
Quit Claude Desktop completely and open it again. Your site's tools appear in the tools menu.
Sign in instead
Prefer no key in an address? Claude can sign in to your site instead (OAuth). This needs a public HTTPS site.
Copy the Server URL
On the Sign in instead tab, click Copy next to the Server URL. It looks like
https://example.com/wp-json/uncoder/v1/mcp, with no link at the end.Add a custom connector
In Claude, open Customize → Connectors → Add custom connector, name it after your site and paste the URL.
Approve
Click Add. Your site opens a sign-in window: log in with your WordPress account if needed, check the permissions and click Approve.
In Claude Code, run claude mcp add --transport http uncoder-my-site https://example.com/wp-json/uncoder/v1/mcp without a link, then open /mcp and choose Authenticate.
The approval screen
When Claude signs in, your site shows who is asking and what the app will be able to do.
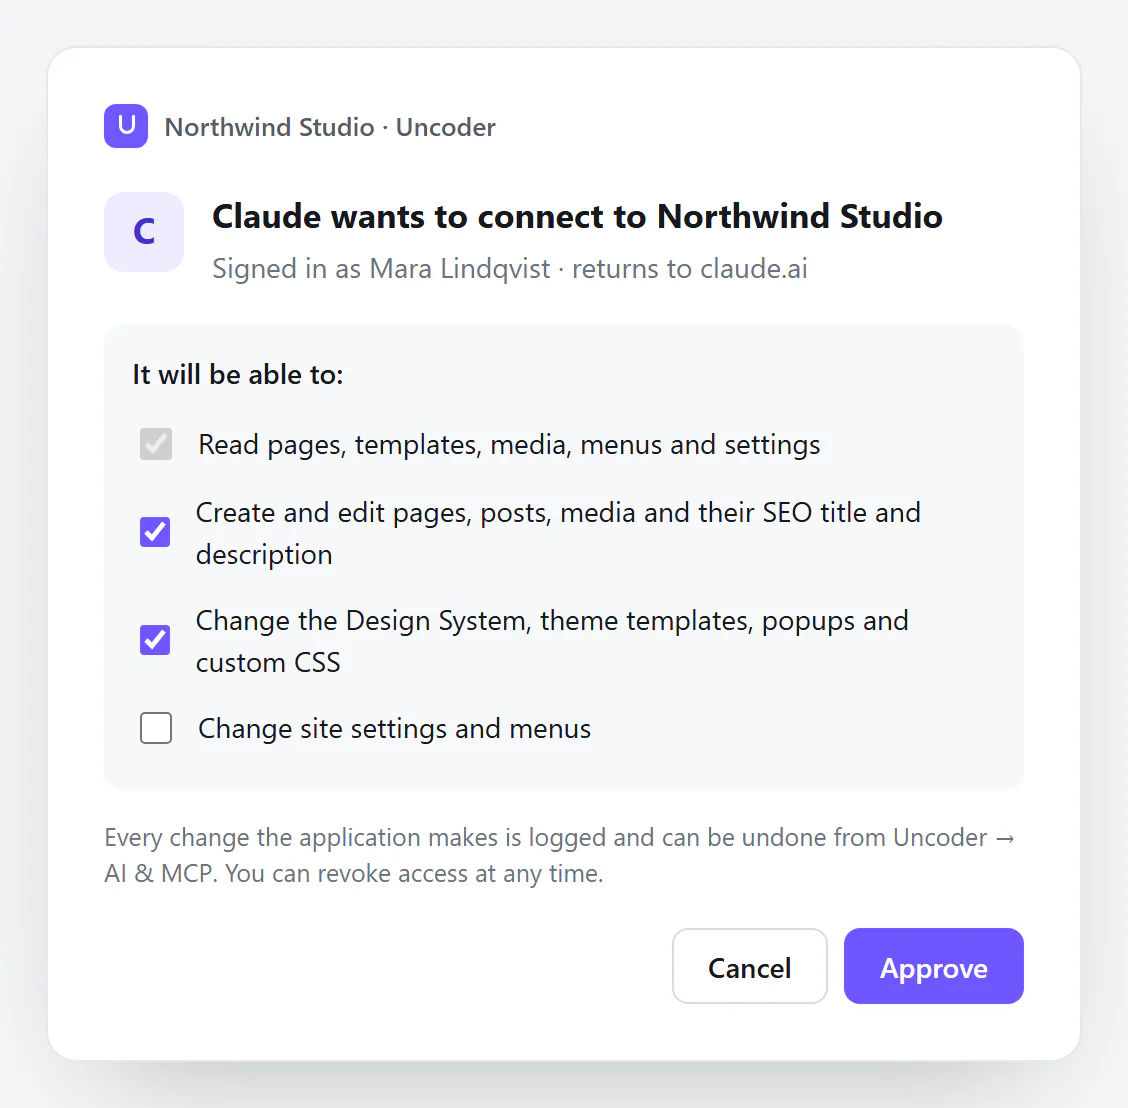
- Read is always included.
- Content and Design are checked by default. Uncheck what you do not want Claude to change.
- Site (site settings, SEO and custom CSS) is unchecked by default. Check it only if you want Claude to change those.
- Permissions your WordPress account does not have are greyed out.
After you click Approve, Claude appears under AI & MCP → Connected apps, where you can disconnect it at any time. Access renews automatically while you use Claude. If you do not use it for 30 days, you sign in again. See API keys & scopes for what each permission allows.
Check that it works
- In Uncoder, open AI & MCP → Activity. Each request from Claude shows up with the tool it used and whether it worked.
- The Calls · 24h counter at the top of the screen goes up.
If Claude cannot connect, see Troubleshooting.