Layers
See the structure of the page, select, rename, lock, hide and reorder elements.
On this page
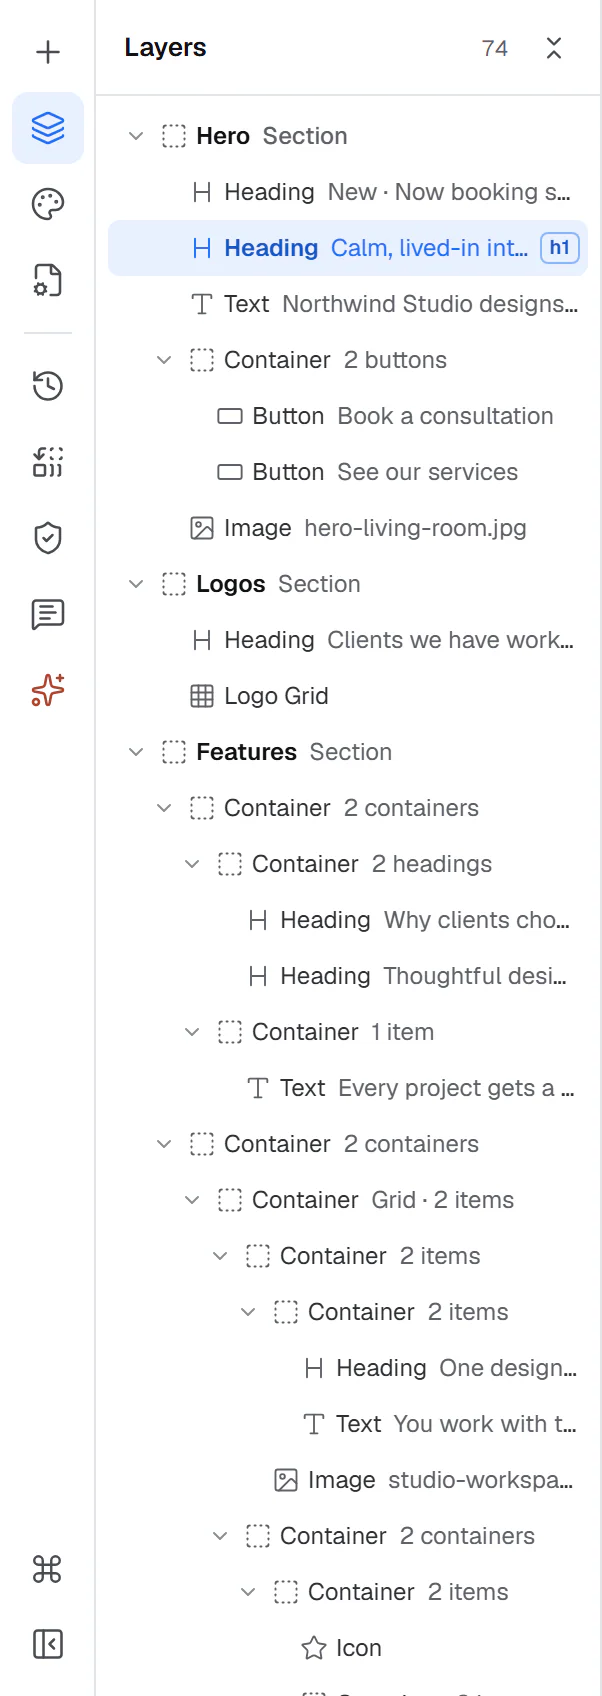
Layers shows your page as a tree: sections, the containers inside them and the widgets inside those. Use it to select elements that are hard to click on the canvas, to reorder them and to give them clear names.
Open Layers
- Click Layers in the rail on the left, just below Insert.
- Press Ctrl+I or Shift+N (⌘+I on a Mac). Press it again to go back to Insert.
- Right-click an element on the canvas and choose Show in layers.
When Panel follows the selection is on in Editor preferences, Layers opens by itself when you click an element on the canvas, with the element shown and its parents expanded. It also takes over from Insert, Styles and Page; tool panels such as History or Notes stay open.
At the top of the panel, next to the title Layers, you see how many elements the page has, and a button to Expand all or Collapse all.
Read a row
Each row shows the element's type and, in grey, what it holds:
- a heading, text or button: the start of its text, for example Heading Calm, lived-in interiors…;
- an image: its alt text or its file name, for example Image hero-living-room.jpg;
- a container: what is inside, for example 2 buttons, 3 items or Grid · 4 items;
- a section (a container at the top level of the page): its first heading.
An element you gave a name shows that name in bold, followed by its kind in grey, for example Hero Section. The page's main heading has an h1 badge.
Select elements
- Click a row to select that element. The canvas scrolls to it if it is out of view.
- Hover a row to highlight the element on the canvas.
- Shift or Ctrl + click adds rows to the selection, so you can edit several elements at once.
- When you select an element on the canvas, its row is revealed and its parents are highlighted.
Rename an element
Double-click a row, type a name and press Enter. Esc cancels. Clear the name to go back to the widget's own name.
Names such as Hero, Pricing or Team make long pages easier to find your way around. They also appear in the path bar, the element's name tag on the canvas and the notes. Visitors never see them.
Reorder elements
Drag a row up or down. Drop it:
- between two rows to place it there;
- on the middle of a container's row to put it inside that container.
Only containers can sit at the top level of a page. Locked rows cannot be dragged. You can also move the selected element with Ctrl+↑ and Ctrl+↓.
Lock, hide or find an element
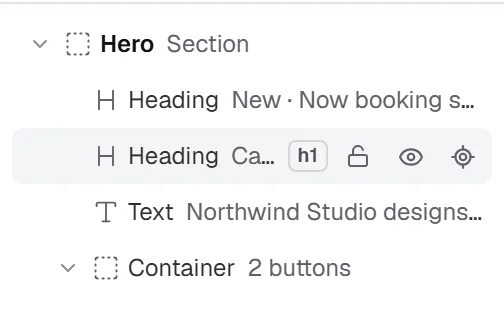
Hover a row to show three buttons on the right:
| Button | What it does |
|---|---|
| Lock | Locks the element: it cannot be moved, deleted or edited until you unlock it. Everything inside it is locked too. Handy for headers and finished sections. |
| Hide on the site (eye) | Hides the element from visitors without deleting it. On the canvas it shows faded and grey, so you still know it is there. Click again to show it. |
| Scroll to element | Scrolls the canvas to the element. |
Flags on a row
Small icons on a row tell you more about the element:
- A crossed-out eye: the element is hidden on one or more devices in Behaviour → Visibility. Hover it to see which, for example Hidden on Mobile. See Visibility.
- A speech bubble: the element has open notes.
- Two circling arrows (Query loop: repeats for each item on the live page): the container repeats for each post. See Query loop containers.
- A person with a check mark (Conditions: shown only when they match): the element has display conditions.
- Template or Component: a Template widget that shows a saved section, with or without its own content.
Right-click menu
Right-click a row for the same menu as on the canvas: Copy, Paste after, Duplicate, Wrap in container, Save as template, Lock, Delete and more. See Copy, paste & duplicate.