Checkout
The checkout: billing and shipping details, the order summary and payment. Place it on the checkout page.
On this page
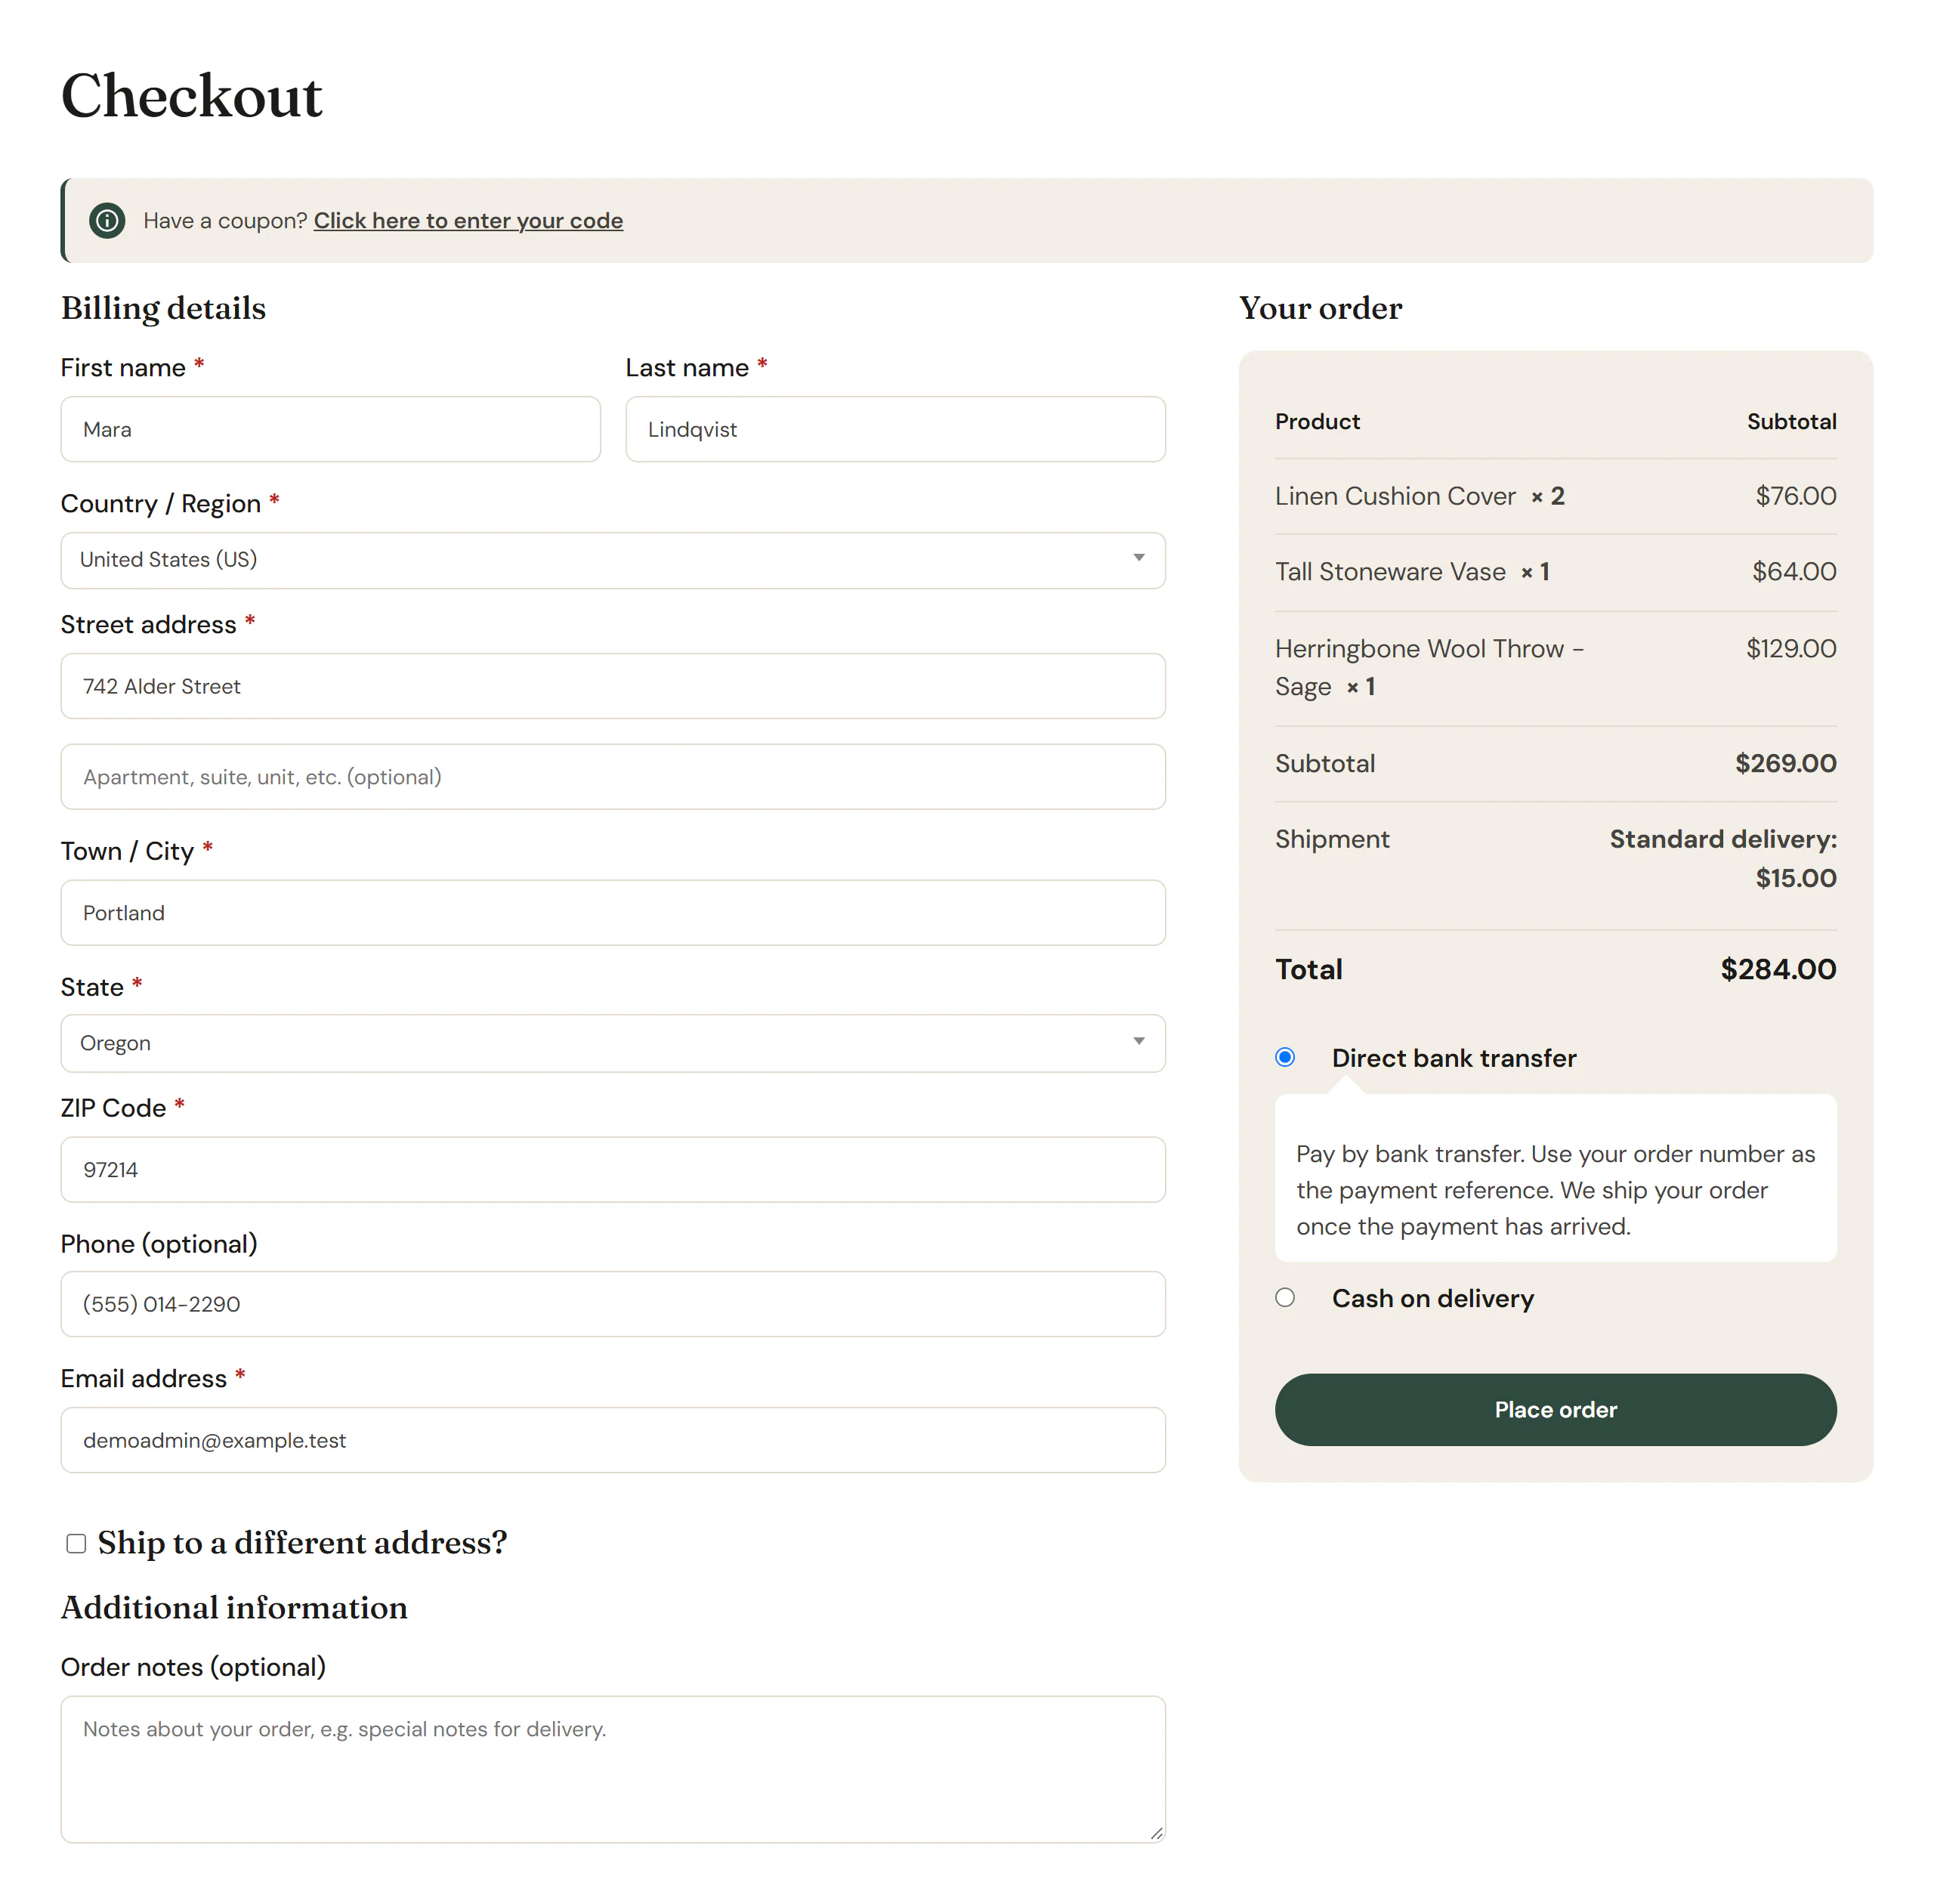
The Checkout widget shows WooCommerce's checkout: the coupon prompt, the billing and shipping details, order notes, the order summary, the payment methods and Place order. It is WooCommerce's classic checkout with your layout and styles, so payment gateways, shipping options and checkout extensions keep working. The "thank you" page after an order and the page where customers pay for an order are shown at the checkout address too, so the widget shows them as well.
Where to place it
Place the widget on your store's checkout page: the page chosen as Checkout page in WooCommerce → Settings → Advanced → Page setup. Proceed to checkout in the cart leads there. See Cart, checkout & account for the steps.
Any page that holds the Checkout widget counts as a checkout page for WooCommerce, so its scripts and checks work there too.
In the editor
The editor has no cart, so the widget shows a sample checkout: the billing fields for your store's country, order notes, your two latest products in the order summary, and the payment methods you have turned on. The sample cannot be sent. If no payment method is on yet, it says No payment method is enabled yet (WooCommerce → Settings → Payments).
Add a Checkout
Open your checkout page with Edit with Uncoder. Then click Insert in the rail on the left, find Checkout in the WooCommerce group (or type "checkout" in the search box) and drag it into a section. See Add elements.
Content tab settings
| Setting | What it does |
|---|---|
| Order summary | Beside the details or Below the details. Empty: beside on desktops, below on tablets and phones. Can differ per device. |
| Summary width | Width of the order summary when it is beside the details. Can differ per device. |
| Gap | Space between the details and the summary. Can differ per device. |
| Summary stays in view while scrolling | Keeps the order summary in view while shoppers fill in the long details form. On by default. |
Design tab settings
| Section | Settings |
|---|---|
| Headings and labels | Heading typography, Heading color, Label typography, Label color and Space between fields. |
| Order summary | Background, Padding, Border, Border radius, Typography and Lines. Under Payment methods: Description background (the box under the chosen method) and Method typography. |
| Place order button | Typography, Text color, Background, Hover background and Border radius. |
As the note in Headings and labels says, the fields follow the Design System's form styles and the buttons follow Design System → Buttons. See Buttons. The Design tab also has the sections every element shares: Spacing & position, Background & border and Mask. See Spacing, size & position.
Behaviour tab
The Behaviour tab has the settings every element shares: anchor and classes, entrance animations, motion effects, visibility per device, display conditions and interactions. See Visibility.
Tips
- Keep the checkout page free of distractions: leave out big banners and popups, so shoppers finish their order.
- The fields shown, such as company name or phone, are WooCommerce's. Change which ones appear in WooCommerce's own settings or with a checkout field extension; the widget shows whatever WooCommerce asks for.