Headers & footers
Build site headers and footers, and make headers sticky, shrinking, transparent or a column beside the page.
On this page
A header template replaces your theme's header, and a footer template replaces its footer, on every page where their display conditions match. You can keep one header for the whole site, or add others for some pages, for example a simpler header on landing pages. Headers also have their own behaviour settings: stay visible while scrolling, hide when scrolling down, shrink, change background, sit in a column beside the page on desktops, or sit transparently over the first section of a page.
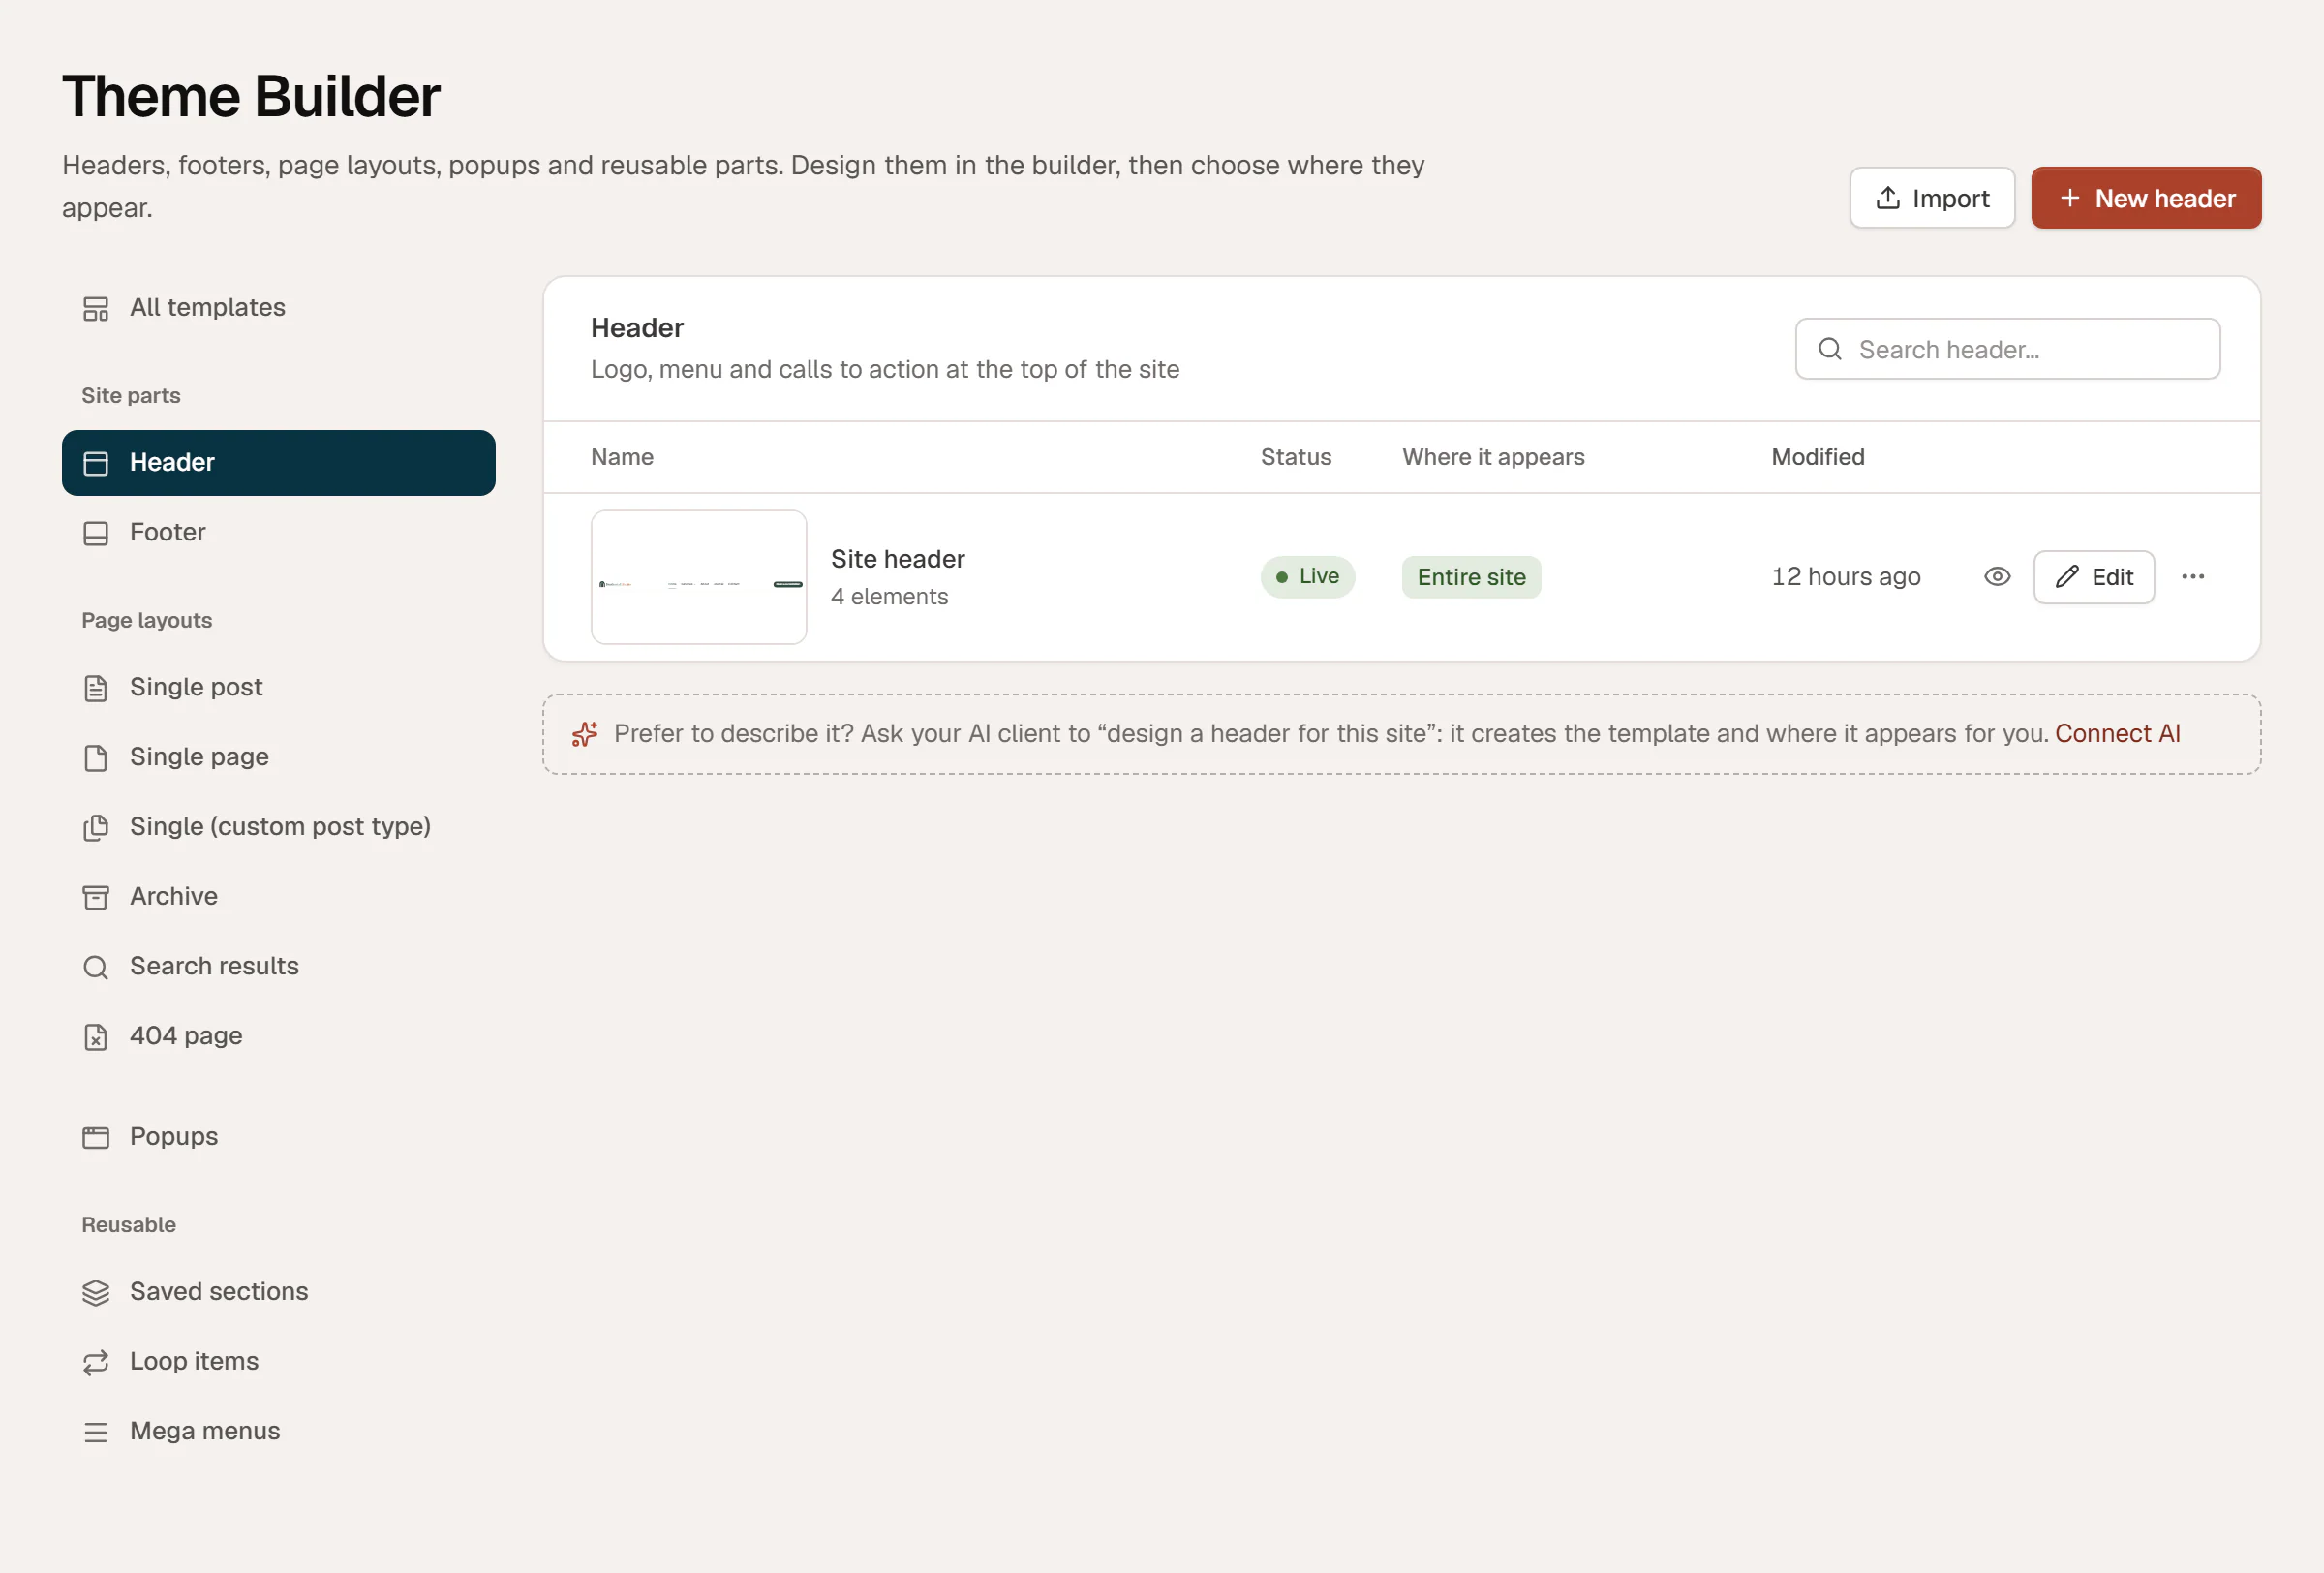


Build a header
Create the template
Go to Uncoder → Theme Builder, click New template, choose Header, name it and click Create and open editor. New headers appear on the Entire site once published.
Design it
Add a row container with a Site Logo, a Nav Menu and a Button, for example "Book a consultation". Other useful widgets: Search Form, Language Switcher, Color Scheme Switch, Social Icons. Set the Nav Menu's mobile menu for small screens. See Nav Menu.
Publish
Click Publish. The header replaces the theme's header right away on the pages its conditions match.
Build a footer the same way with the Footer type: columns of links (Icon List or Nav Menu), contact details, social icons and a copyright line. For a year that updates by itself, add the Current date dynamic tag with the format Y.
Uncoder places a header template inside a <header> element and a footer inside <footer>, so screen readers and search engines recognise them.
Pages that use the Uncoder Canvas (no header/footer) page template show neither the header nor the footer. Use it for landing pages. See Page settings.
Edit the header from a page
You do not have to go through the Theme Builder to change a header or footer. While you edit a page, hover its header on the canvas: it gets a lavender outline and a button with the header's name, for example Edit Header · Site header. Click it to open the header in the editor, in the same browser tab. If the page has unsaved changes, the editor asks first. Footers work the same way, with Edit Footer.
In the header's editor, the top bar starts with a back button: ← and the name of the page you came from. Click it to go back to the page. After you save the header, the confirmation message also has a Back to button with the page's name.
Header behaviour
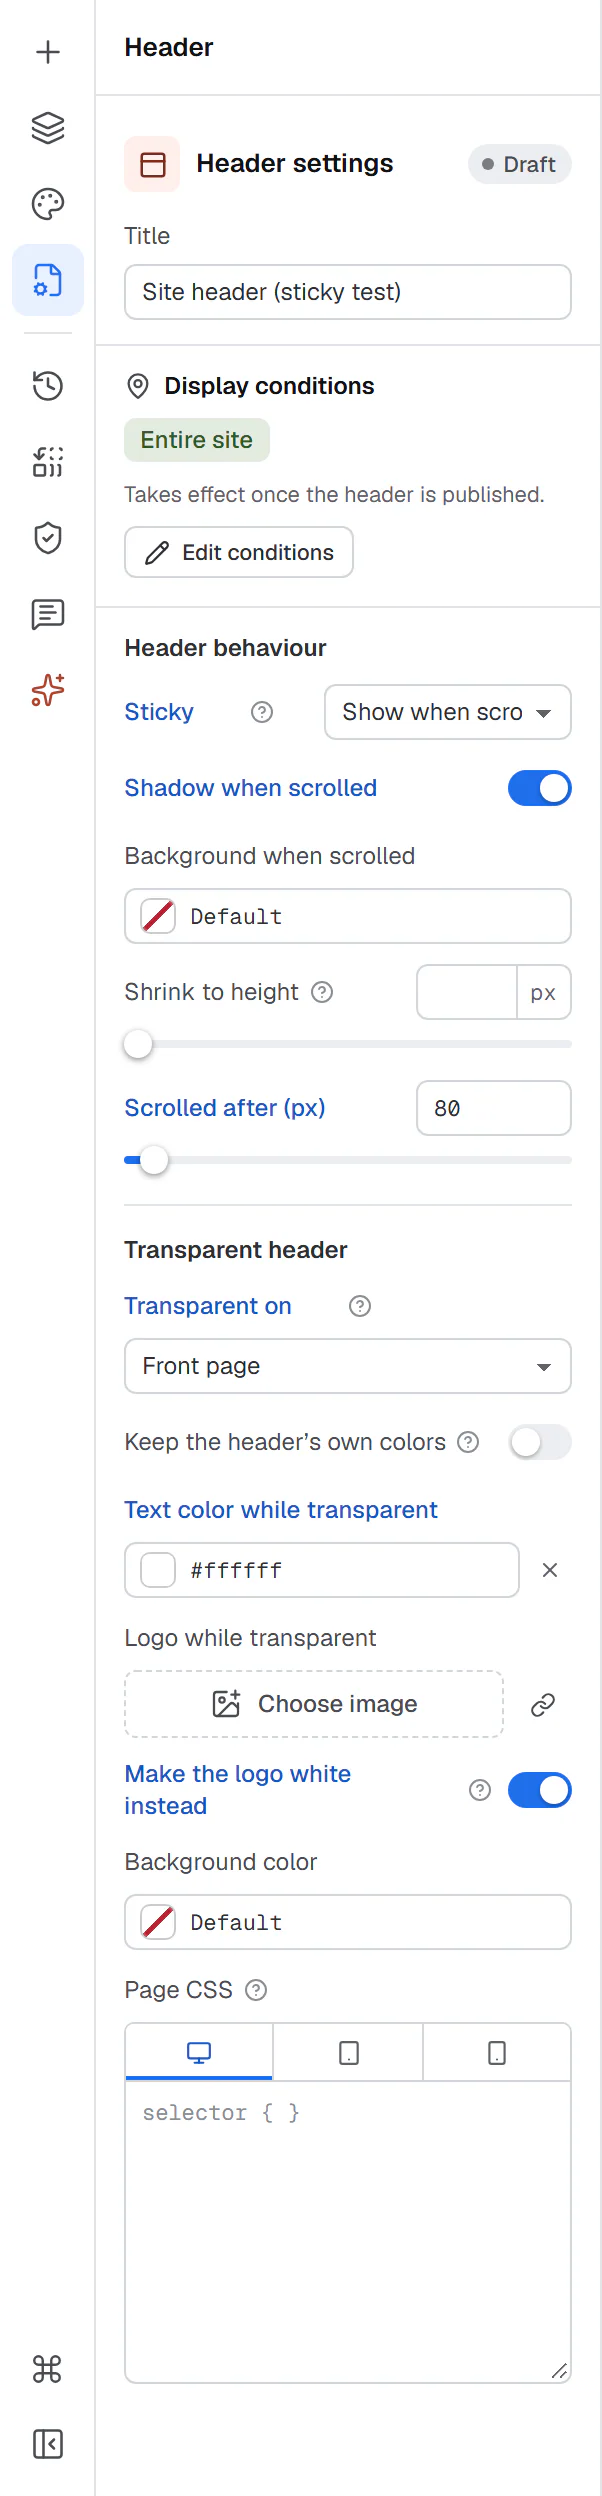
Open the header in the editor and click Header in the rail on the left (the fourth button, named after the document). Below Display conditions, the Header behaviour, Side header and Transparent header settings control where the header sits and how it reacts while the visitor scrolls.
Make the header sticky
Choose a Sticky mode:
| Sticky | What happens |
|---|---|
| Off — scrolls away | The header scrolls out of view with the page. |
| Always visible | The header stays at the top of the window. |
| Show when scrolling up | The header hides while the visitor scrolls down and comes back as soon as they scroll up. It saves space on phones. |
A sticky header does not cover the sections you link to: links to #anchors on the same page stop right below it. If a keyboard user tabs to a link inside a hidden header, it comes back into view.
A header whose outer container is set to Sticky: Top in Behaviour → Motion & effects also counts as Always visible.
Shrink and change the header when scrolled
With Sticky on, these settings apply once the page has scrolled:
| Setting | What it does |
|---|---|
| Shadow when scrolled | Adds a soft shadow under the header. On by default. |
| Background when scrolled | A background color for the header row, for example white over a colored first section. |
| Shrink to height | The minimum height of the header row once the page scrolls (40–160 px). Leave it empty to keep the height. |
| Scrolled after (px) | How far the visitor must scroll before the "scrolled" look starts (10 px by default). |
Put the header in a column beside the page
Many restaurant and portfolio sites show the logo and menu in a column at the side of the page instead of a bar across the top. Under Side header, set On desktops to A column on the left or A column on the right.
On desktops, the header then becomes a full-height column fixed beside the page: it stays in place while the page scrolls, and scrolls on its own when its content is taller than the screen. The page makes room for it, so nothing is hidden behind the column. Tablets and phones keep the header as a bar across the top.
| Setting | What it does |
|---|---|
| On desktops | Across the top (the normal bar), A column on the left or A column on the right. Default: Across the top. |
| Column width | The width of the column, from 160 to 640 px. Default: 320 px. Shown when On desktops is a column. |
Build the header so it works as a column and as a bar:
- Select the header's outer container and set Direction to Column on Desktop, so its rows stack down the column. Switch to Tablet and set it back to Row, for the logo and the hamburger side by side.
- Set the Nav Menu's Layout to Vertical and keep Show hamburger on at Tablet and mobile. See Nav Menu.
- Hide what belongs only in the column, such as opening hours or social icons, with Hide on tablet and Hide on mobile. See Visibility.
Links to #anchors on the same page are not pushed down by a side column, because it covers nothing above them.
Make the header transparent
A transparent header sits over the first section of the page, for example on a home page with a full-width photo. Set Transparent on:
| Transparent on | Pages |
|---|---|
| Nowhere | The header is never transparent. |
| All pages | Every page where this header appears. |
| Front page | Only the home page. |
| Pages that turn it on | Only pages whose own Transparent header setting is Transparent on this page. |
A second Transparent on field below it chooses the devices: Desktop, Tablet and Mobile, all of them by default. Leave a device out to keep an ordinary bar there, for example when the hero photo sits under the header only on desktops and starts below the bar on tablets and phones.
Then choose how it looks while transparent:
| Setting | What it does |
|---|---|
| Keep the header's own colors | Only lays the header over the page: text, menu and logo keep their normal colors. Use it over a light photo or a pale first section. |
| Text color while transparent | Color of the menu, the site title and icons over the photo (white by default). Dropdown menus keep their own colors. |
| Logo while transparent | A light version of your logo, shown by the Site Logo widget while the header is transparent. |
| Make the logo white instead | When you have no light logo, turns the normal logo white. |
When the header is also sticky, it turns solid (normal colors and logo, Background when scrolled if set) as soon as the page scrolls. A transparent header that is not sticky scrolls away as it is. When the mobile menu is open, the header turns solid so the menu stays readable.
Each page built with Uncoder can override the header's choice in its own settings: in the page's Page settings (the Page button in the rail), set Transparent header to Use the header’s setting, Transparent on this page or Solid on this page. Give the first section of a page with a transparent header enough top padding, so its content is not hidden behind the header. Padding can differ per device, so when the header is transparent on desktops only, add the extra padding on Desktop and take it off again on Tablet.
Use different headers on different pages
Create a second header and give it more specific conditions. For example, keep Site header on the Entire site and add Landing header with Posts, pages & custom types → Pages → your landing pages. The more specific template wins on those pages. See Template conditions.