Add to Cart
WooCommerce's add to cart form for every product type, with − / + buttons and adding without reloading the page.
On this page
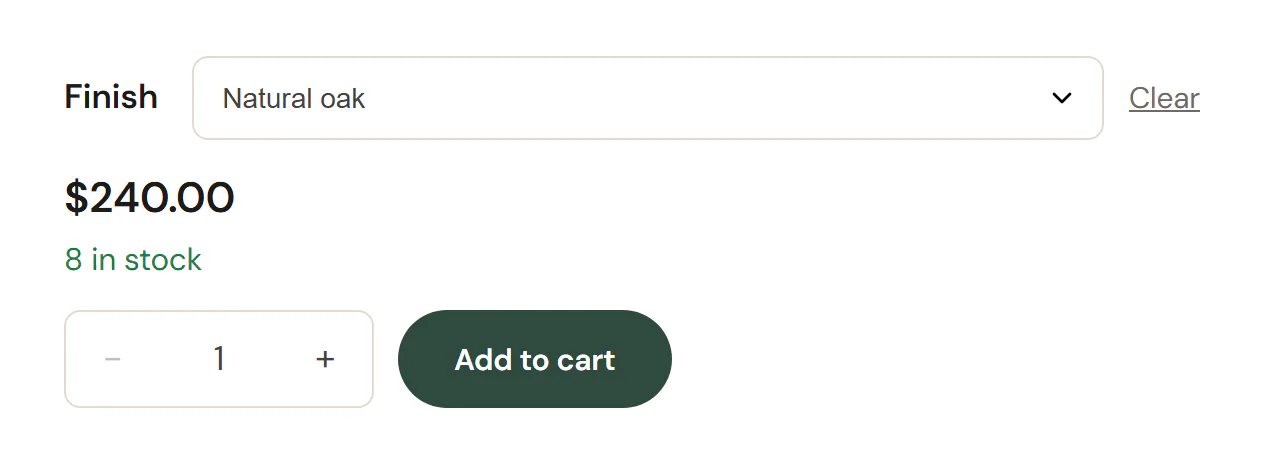
The Add to Cart widget shows WooCommerce's own add to cart form for the product: the quantity field and the button, the option fields of a product with options (such as Size and Color), the list of a grouped product, or the buy button of an external product. Product types that extensions add, such as subscriptions, keep their own form. In product cards, the widget shows WooCommerce's add to cart button instead.
Where the product comes from
The widget shows the product being viewed: on a product page template it is the product the visitor opened, and in a product loop item it is each card's product. To sell one particular product anywhere else, such as on a landing page, pick it in the Product section of the Content tab.
Add an Add to Cart
Open your product page template or a product loop item in the Theme Builder. Then click Insert in the rail on the left, find Add to Cart in the WooCommerce group (or type "cart" in the search box) and drag it into the template. See Add elements.
What it shows for each product type
| Product | What visitors see |
|---|---|
| Simple product | The stock status, the quantity field and the button. |
| Variable product | A field per option. Once all options are picked, the price, stock and image of that option appear, then the quantity and the button. A Clear link resets the choice. |
| Grouped product | A list of the products in the group, each with its own quantity, and one button. |
| External / Affiliate product | A button that leads to the other shop, with the button text set in the product. |
Shows decides between the form and the button. Automatic shows the full form on product pages and the button in product loop items, which fits nearly always. Full form and Button only force one of them. The button is WooCommerce's own: Add to cart for products that can go straight into the cart, Select options for products with options (it leads to the product page), or Read more for products that cannot be bought right now.
When the product cannot be added to the cart (out of stock with Stock status off, or without a price), the editor shows a note and the live page shows nothing.
Add without reloading the page
Turn on Add without reloading the page to keep shoppers on the product page. When they click the button:
- the product goes into the cart without a page reload;
- the message ("… has been added to your cart", or an error) appears in the Woo Notices widget, or above the product, or else above the button;
- every Mini Cart on the page updates its count and contents, and its drawer can open by itself.
If WooCommerce is set to send shoppers to the cart after adding a product (WooCommerce → Settings → Products), they still go to the cart. If the connection fails, the form is sent the normal way.
This setting is for the full form. The buttons in product cards add without reloading when Enable AJAX add to cart buttons on archives is on in WooCommerce → Settings → Products.
Content tab settings
| Setting | What it does |
|---|---|
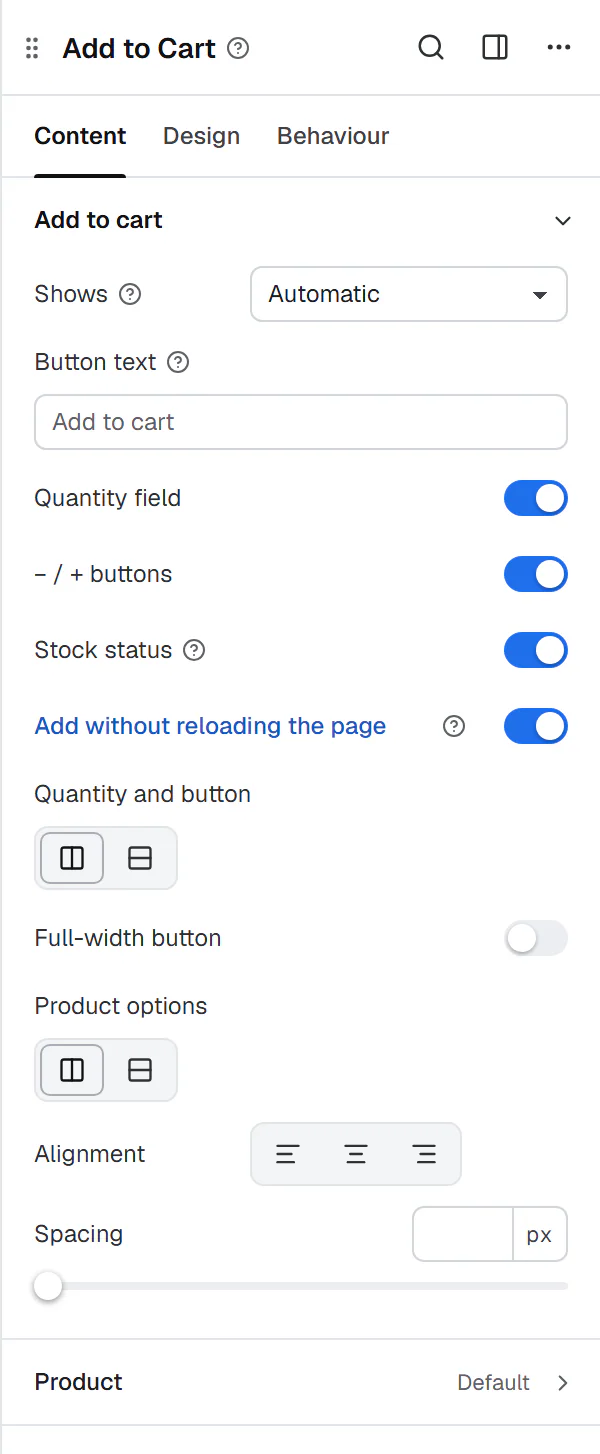
| Shows | Automatic, Full form or Button only. Default: Automatic (the full form on product pages, the button in product loop items). |
| Button text | Your own text for the button, such as "Add to bag". Leave empty for WooCommerce's text, which changes with the product type and stock. Your text only replaces buttons that add to the cart; Select options and Read more keep WooCommerce's text. |
| Quantity field | Shows the quantity field. On by default. When off, one item is added (grouped products keep their quantities). |
| − / + buttons | Buttons on each side of the quantity field. They respect the product's minimum, maximum and step. On by default. Shown when Quantity field is on. |
| Stock status | "12 in stock" above the button, as WooCommerce shows it. On by default. |
| Add without reloading the page | Adds to the cart in place. See above. Off by default. |
| Quantity and button | Side by side or Stacked. Default: Side by side. |
| Full-width button | Stretches the button to the full width. Off by default. |
| Product options | The option fields of variable products: Label beside the field or Label above the field. Default: Label beside the field. |
| Alignment | Left, Center or Right. Can differ per device. |
| Spacing | Space between the parts of the form. Can differ per device. |
| Setting | What it does |
|---|---|
| Product | Leave empty to show the product being viewed (product pages, product loop items). Pick a product to show it on any page. |
Design tab settings
| Section | Settings |
|---|---|
| Button | Typography; Text color, Background, Border and Shadow (Normal tab); Text color, Background and Border color (Hover tab); Padding and Border radius. |
| Quantity | Width, Typography, Text color, Background, Border color, Border radius and − / + hover background. Shown when Quantity field is on. |
| Product options | Label typography, Label color, Field typography, Field text color, Field background, Field border color, Space between options, Option price color (the price shown once options are picked) and "Clear" link color. |
| Stock status | Typography, and the colors for In stock and Out of stock. Shown when Stock status is on. |
The button follows Design System → Buttons, as the note in the Button section says; change it here for this widget only. See Buttons. The Design tab also has the sections every element shares: Spacing & position, Background & border and Mask. See Spacing, size & position.
Behaviour tab
The Behaviour tab has the settings every element shares: anchor and classes, entrance animations, motion effects, visibility per device, display conditions and interactions. See Visibility.
Tips
- With Add without reloading the page on, add a Woo Notices widget near the top of the product template, so the message appears where you want it.
- If you also use the Product Stock widget, turn Stock status off here so the stock does not show twice.
- To sell one product on a landing page, pick it in Product and add a Product Price with the same product next to it.
- For a product with options on a landing page, give the section around the widgets the CSS class
product(Behaviour → Anchor & classes → CSS classes). Then the Product Images and the SKU in Product Meta change with the chosen option, as they do on product pages.